An update about what I do with vim, making it more powerful and taking away some of the envy I have for the excellent IDE's out there (for example PyCharm and the rest of the IntelliJ family by JetBrains - try it, it's awesome). Also, it makes vim look a lot better in the progress.
I will be talking about my vim configuration as it is currently in my dotfiles repository. You can always find the latest version here and maybe have some inspiration from the rest of my dotfiles.
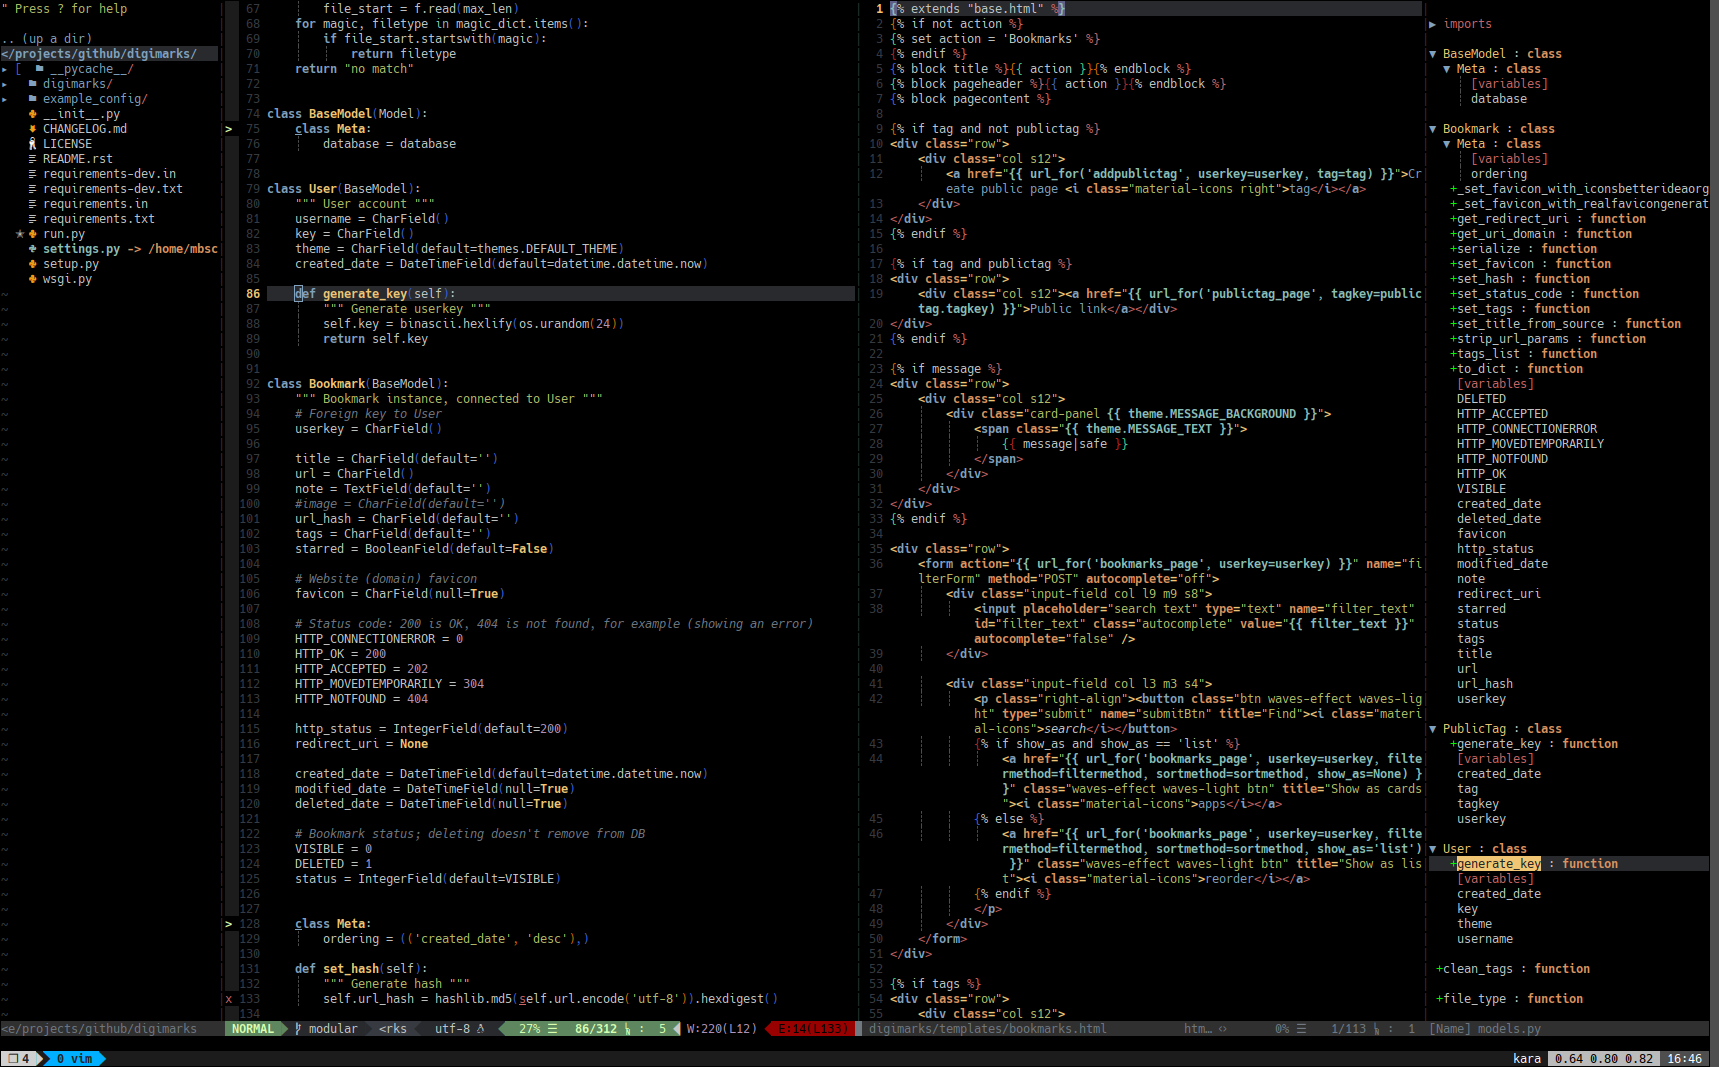
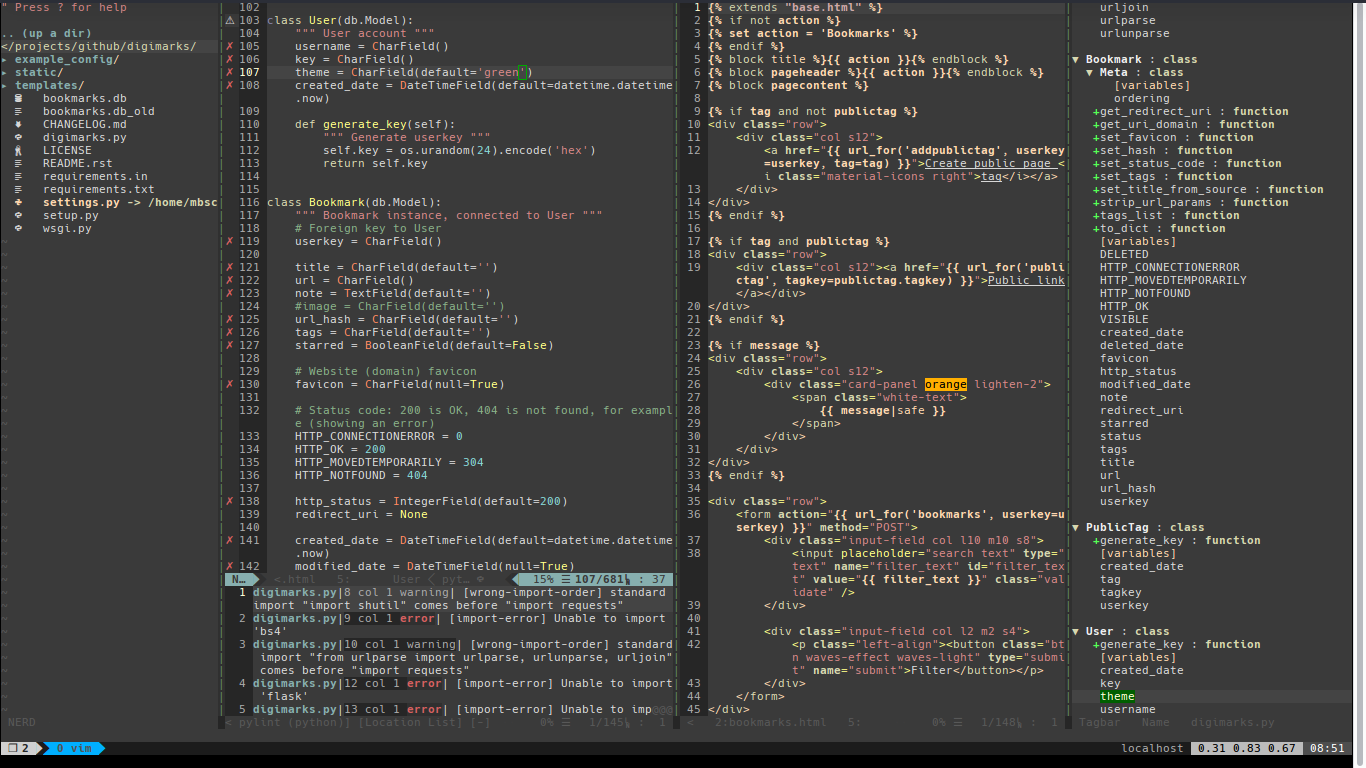
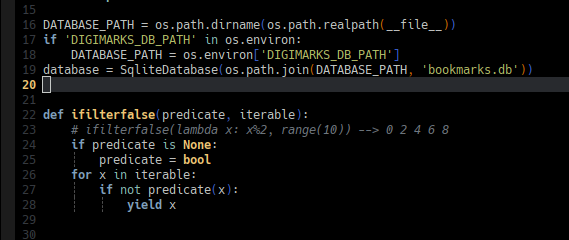
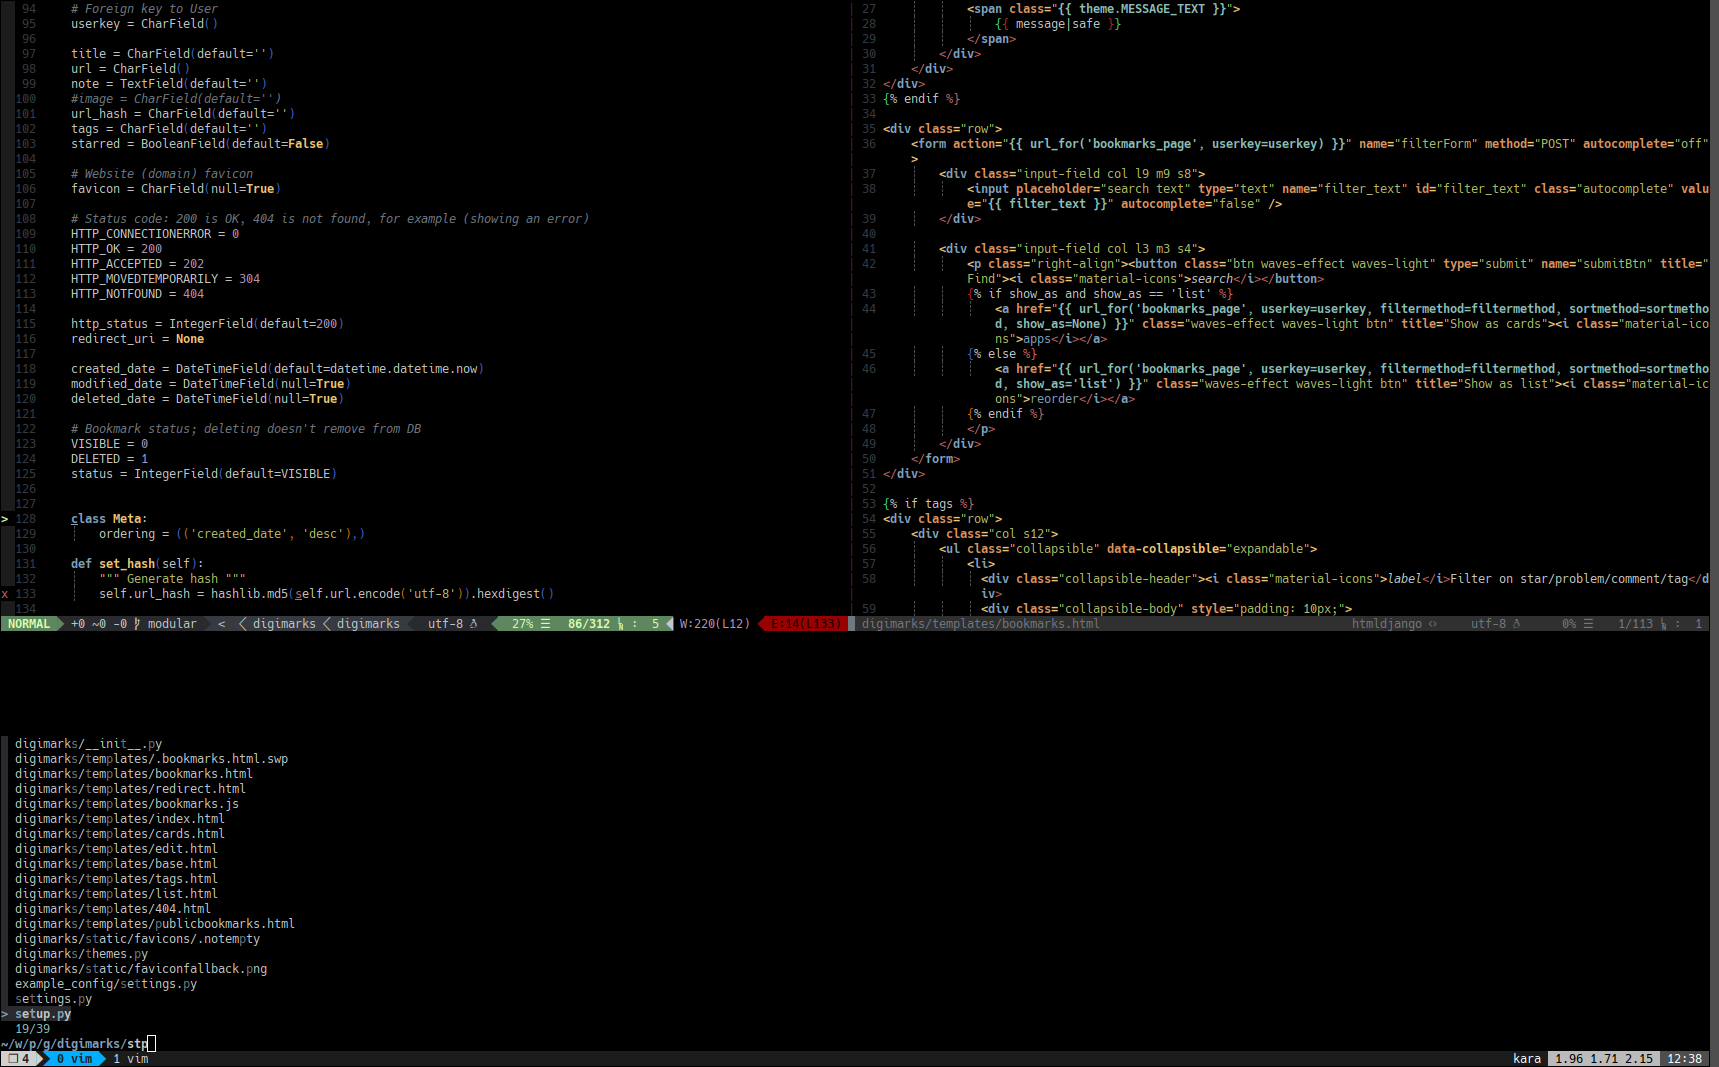
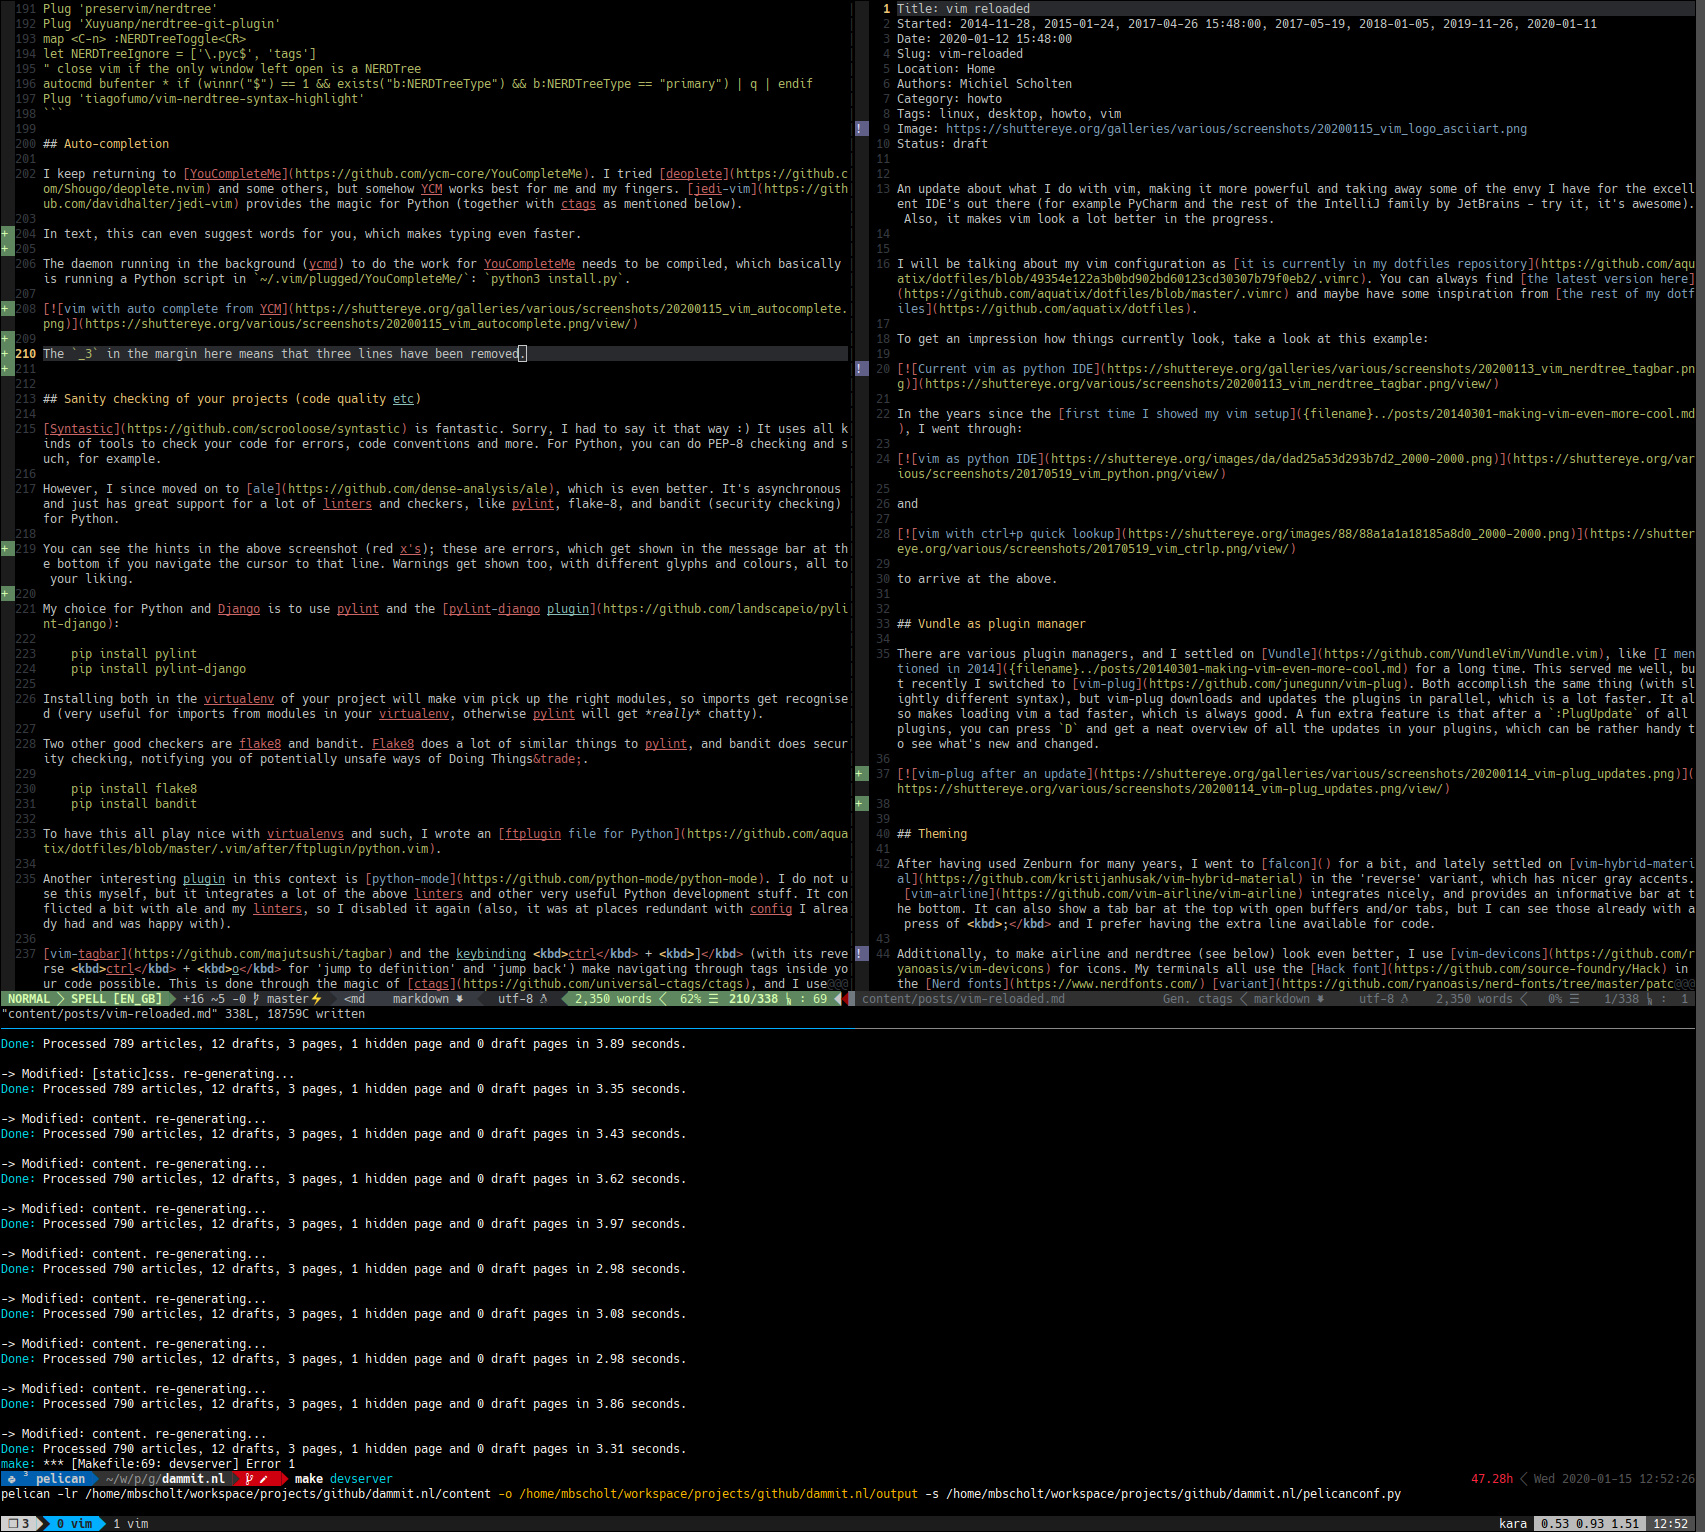
To get an impression how things currently look, take a look at this example:
In the years since the first time I showed my vim setup, I went through:
and
to arrive at the above.
Vundle as plugin manager
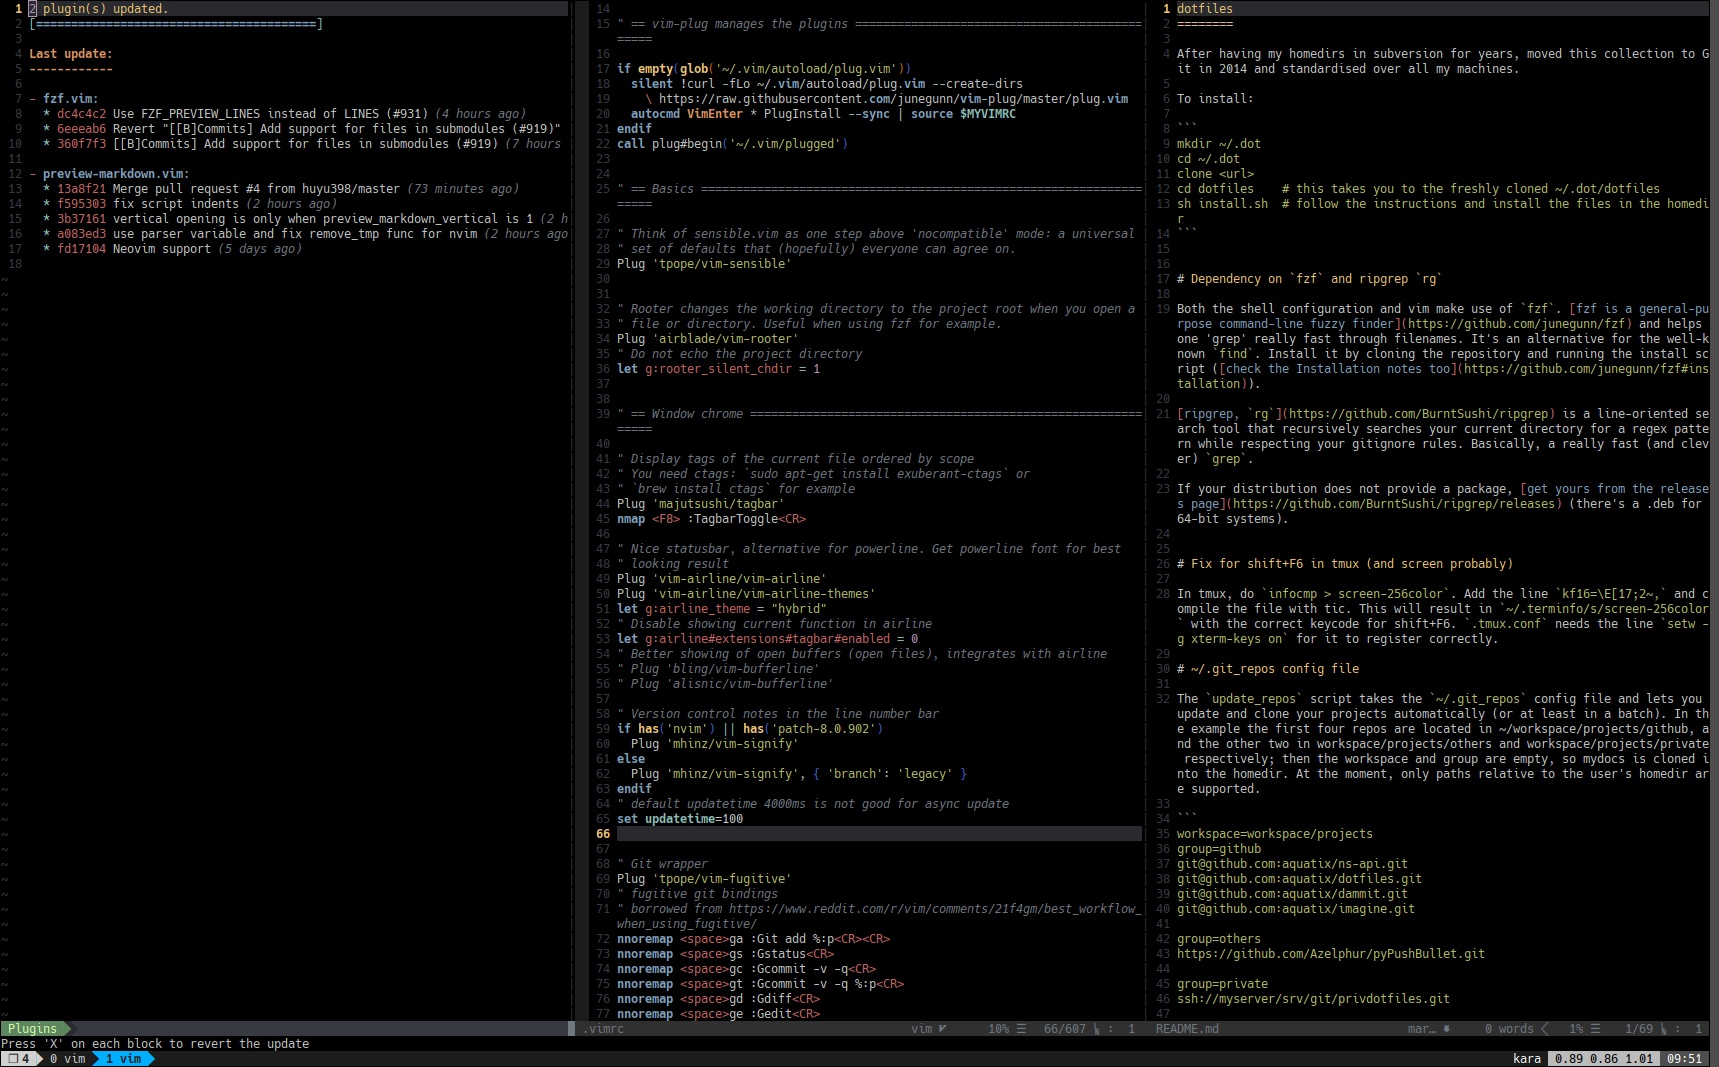
There are various plugin managers, and I settled on Vundle, like I mentioned in 2014 for a long time. This served me well, but recently I switched to vim-plug. Both accomplish the same thing (with slightly different syntax), but vim-plug downloads and updates the plugins in parallel, which is a lot faster. It also makes loading vim a tad faster, which is always good. A fun extra feature is that after a :PlugUpdate of all plugins, you can press D and get a neat overview of all the updates in your plugins, which can be rather handy to see what's new and changed.
You can even revert updates with X.
Theming
After having used Zenburn for many years, I went to falcon for a bit, and lately settled on vim-hybrid-material in the 'reverse' variant, which has nicer gray accents. vim-airline integrates nicely, and provides an informative bar at the bottom. It can also show a tab bar at the top with open buffers and/or tabs, but I can see those already with a press of ; and I prefer having the extra line available for code.
Additionally, to make airline and nerdtree (see below) look even better, I use vim-devicons for icons. My terminals all use the Hack font in the Nerd fonts variant, which ensures that the glyphs used are available in the monospaced font of the 'GUI'. vim-nerdtree-syntax-highlight makes the icons show up in different colours, depending on the file formats.
" Nice colour scheme
Plug 'kristijanhusak/vim-hybrid-material'

" Nice statusbar, alternative for powerline. Get powerline font for best
" looking result
Plug 'vim-airline/vim-airline'
Plug 'vim-airline/vim-airline-themes'
let g:airline_theme = "hybrid"
" Disable showing current function in airline
let g:airline#extensions#tagbar#enabled = 0
" Better showing of open buffers (open files), integrates with airline
" Plug 'bling/vim-bufferline'
" Plug 'alisnic/vim-bufferline'

" Ensure 256 colour support if the terminal supports it
if &term == "xterm" || &term == "xterm-256color" || &term == "screen-bce" || &term == "screen-256color" || &term == "screen" || &term == "tmux-256color-italic"

    set background=dark
    let g:enable_bold_font = 1
    let g:enable_italic_font = 1
    let g:hybrid_transparent_background = 1
    colorscheme hybrid_reverse

    " create a bar for airline
    set laststatus=2
    let g:airline_powerline_fonts = 1
endif

" This is what sets vim to use 24-bit colors. It will also work for any version of neovim
" newer than 0.1.4.
if exists('+termguicolors')
  let &t_8f = "\<Esc>[38;2;%lu;%lu;%lum"
  let &t_8b = "\<Esc>[48;2;%lu;%lu;%lum"
  set termguicolors
endif

" Toggle paste and autoindent mode (enable paste so no indention weirdness
" happens when pasting into the current file)
set pastetoggle=<F10>

" Web Development/Filetype icons
" Needs a font like found at
" https://github.com/ryanoasis/nerd-fonts
Plug 'ryanoasis/vim-devicons'
" Set guifont when using gvim:
"set guifont=Droid\ Sans\ Mono\ for\ Powerline\ Plus\ Nerd\ File\ Types\ 11

" reload file when changes happen in other editors
set autoread

" hide buffers instead of closing them (so no saving is needed and undo and
" marks are preserved)
set hidden
To help with reading code, indentLine and rainbow brackets is used:
" Show indentation marks, enables conceallevel 2, so for example hides quotes
" in json files
Plug 'Yggdroot/indentLine'
let g:indentLine_char = '┊'
"let g:indentLine_setConceal = 0
let g:indentLine_conceallevel = 1

" Colour-match brackets
Plug 'luochen1990/rainbow'
let g:rainbow_active = 1 "set to 0 if you want to enable it later via :RainbowToggle
" Do not use rainbow parentheses in these file types:
let g:rainbow_conf = {
\  'separately': {
\    'todo': 0
\  },
\}
fzf
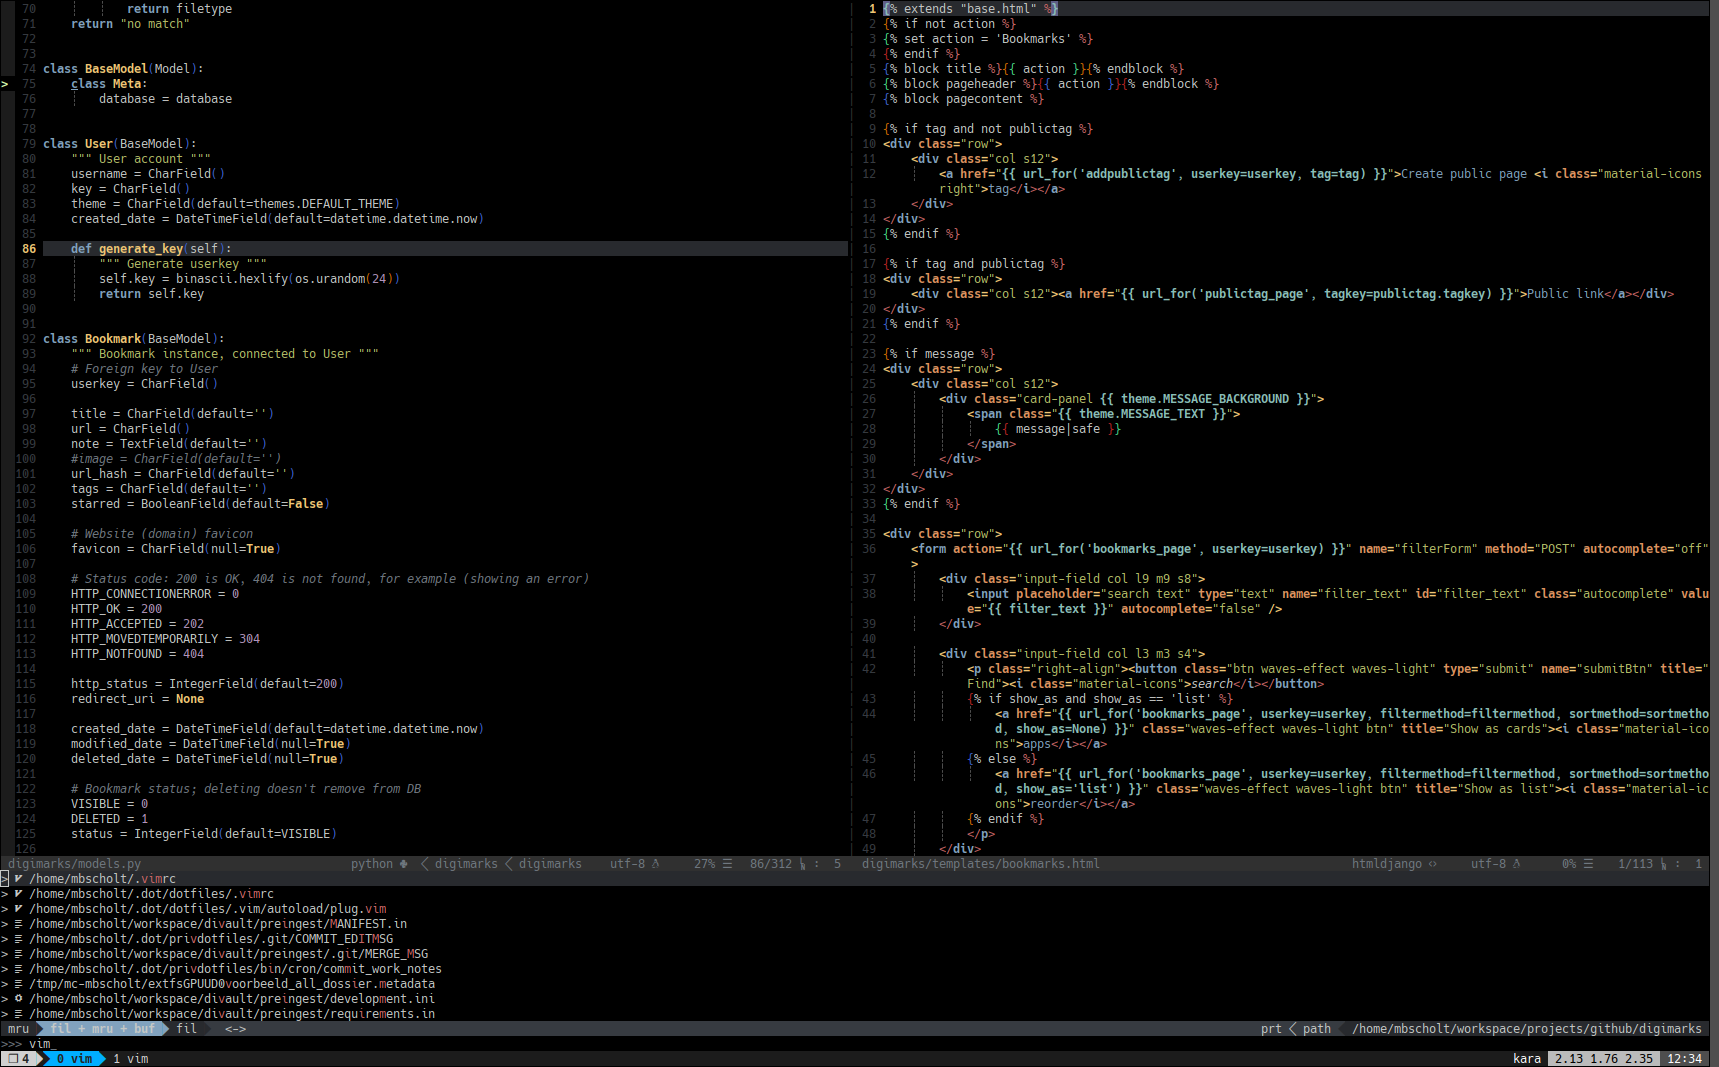
I bound looking through buffers to ;, as I use buffers quite a lot. This way I can quickly switch to another file I have open.
Find more tricks to do with fzf and vim in this article: Fuzzy finding with FZF.vim.
Quickly opening files is done through leader+o, and looking through the content of files is bound to leader+f. This file search leverages the awesome grepping powers of ripgrep:
" Find term where term is the string you want to search, this will open up a
" window similar to :Files but will only list files that contain the term
" searched
" https://medium.com/@crashybang/supercharge-vim-with-fzf-and-ripgrep-d4661fc853d2
command! -bang -nargs=* Find call fzf#vim#grep('rg --column --line-number --no-heading --fixed-strings --ignore-case --hidden --follow --color "always" '.shellescape(<q-args>).'| tr -d "\017"', 1, <bang>0)

" Search contents of files with ripgrep
" https://sidneyliebrand.io/blog/how-fzf-and-ripgrep-improved-my-workflow
command! -bang -nargs=* Rg
  \ call fzf#vim#grep(
  \   'rg --column --line-number --hidden --smart-case --no-heading --color=always '.shellescape(<q-args>), 1,
  \   <bang>0 ? fzf#vim#with_preview({'options': '--delimiter : --nth 4..'}, 'up:60%')
  \           : fzf#vim#with_preview({'options': '--delimiter : --nth 4..'}, 'right:50%:hidden', '?'),
  \   <bang>0)

" Files command with preview window
command! -bang -nargs=? -complete=dir FilesPreview
  \ call fzf#vim#files(<q-args>, fzf#vim#with_preview(), <bang>0)

" Simply type ; to search through buffers, leader-o to search through file
" names, leader-O to search through file names, showing a preview window,
" \t for tags, \c for (Git) commits and \f to search through contents of files
nmap ; :Buffers<CR>
nmap <Leader>o :Files<CR>
nmap <Leader>O :FilesPreview<CR>
nmap <Leader>t :Tags<CR>
nmap <Leader>c :Commits<CR>
" nmap <Leader>f :Find<CR>
nmap <Leader>f :Rg<CR>
nmap <Leader>l :Lines<CR>
ctrl+p
Alternatively, one can still quickly find and open files through the trusty ol' ctrl+p:
" Full path fuzzy file, buffer, mru, tag, ... finder
" Quickly open files, fuzzy search on name
Plugin 'ctrlpvim/ctrlp.vim'
"let g:ctrlp_map = '<Leader>t'
let g:ctrlp_map = '<c-p>'
" Search in Files, Buffers and MRU files at the same time:
let g:ctrlp_cmd = 'CtrlPMixed'
let g:ctrlp_match_window_bottom = 1
let g:ctrlp_match_window_reversed = 0
let g:ctrlp_custom_ignore = '\v\~$|\.(o|swp|pyc|wav|mp3|ogg|blend)$|(^|[/\\])\.(hg|git|bzr)($|[/\\])|__init__\.py'
let g:ctrlp_working_path_mode = 0
let g:ctrlp_dotfiles = 0
let g:ctrlp_switch_buffer = 0
nerdtree
Yet another way of navigating through files is nerdtree, which provides a tree view with directories and files, like in a file manager. nerdtree-git-plugin provides Git status information about the files being listed.
" Quick file system tree, mapped to Ctrl+n for quick toggle
Plug 'preservim/nerdtree'
Plug 'Xuyuanp/nerdtree-git-plugin'
map <C-n> :NERDTreeToggle<CR>
let NERDTreeIgnore = ['\.pyc$', 'tags']
" close vim if the only window left open is a NERDTree
autocmd bufenter * if (winnr("$") == 1 && exists("b:NERDTreeType") && b:NERDTreeType == "primary") | q | endif
Plug 'tiagofumo/vim-nerdtree-syntax-highlight'
Auto-completion
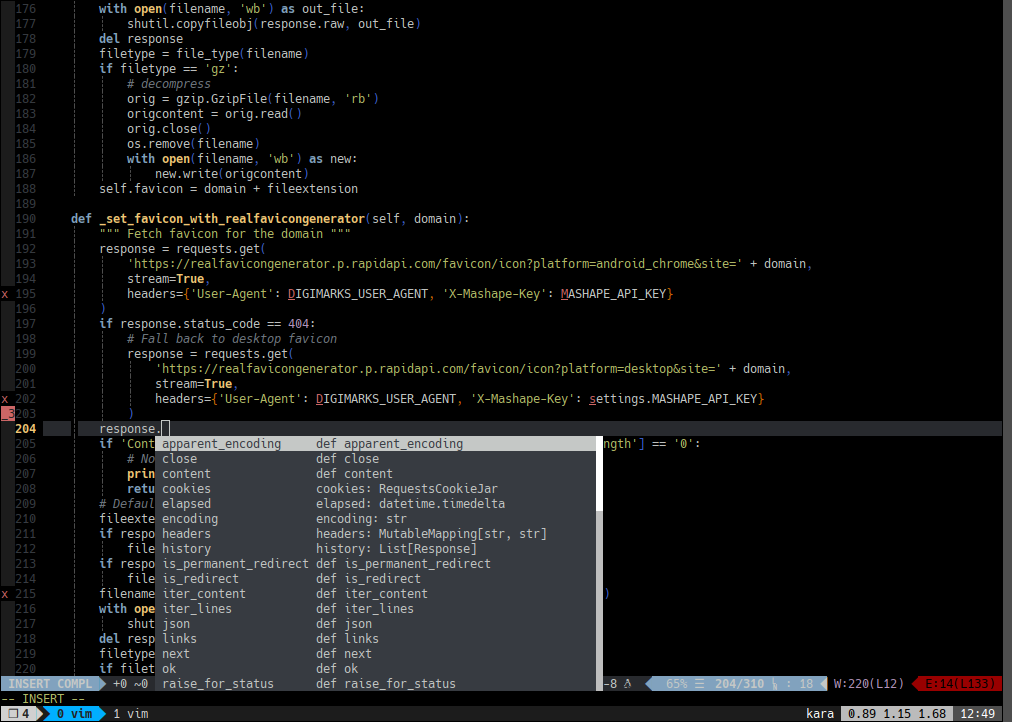
I keep returning to YouCompleteMe. I tried deoplete and some others, but somehow YCM works best for me and my fingers. jedi-vim provides the magic for Python (together with ctags as mentioned below).
In text, this can even suggest words for you, which makes typing even faster.
The daemon running in the background (ycmd) to do the work for YouCompleteMe needs to be compiled, which basically is running a Python script in ~/.vim/plugged/YouCompleteMe/: python3 install.py.
The _3 in the margin here means that three lines have been removed.
Sanity checking of your projects (code quality etc)
Syntastic is fantastic. Sorry, I had to say it that way :) It uses all kinds of tools to check your code for errors, code conventions and more. For Python, you can do PEP-8 checking and such, for example.
However, I since moved on to ale, which is even better. It's asynchronous and just has great support for a lot of linters and checkers, like pylint, flake-8, and bandit (security checking) for Python.
You can see the hints in the above screenshot (red x's); these are errors, which get shown in the message bar at the bottom if you navigate the cursor to that line. Warnings get shown too, with different glyphs and colours, all to your liking.
My choice for Python and Django is to use pylint and the pylint-django plugin:
pip install pylint
pip install pylint-django
Installing both in the virtualenv of your project will make vim pick up the right modules, so imports get recognised (very useful for imports from modules in your virtualenv, otherwise pylint will get really chatty).
Two other good checkers are flake8 and bandit. Flake8 does a lot of similar things to pylint, and bandit does security checking, notifying you of potentially unsafe ways of Doing Things™.
pip install flake8
pip install bandit
To have this all play nice with virtualenvs and such, I wrote an ftplugin file for Python.
Another interesting plugin in this context is python-mode. I do not use this myself, but it integrates a lot of the above linters and other very useful Python development stuff. It conflicted a bit with ale and my linters, so I disabled it again (also, it was at places redundant with config I already had and was happy with).
vim-tagbar and the keybinding ctrl + ] (with its reverse ctrl + o for 'jump to definition' and 'jump back') make navigating through tags inside your code possible. This is done through the magic of ctags, and I use the vim-rooter plugin to make sure ctags and other lookups, like the one from fzf mentioned above, work from the root of a project. It looks for version repository hints and such.
ctags is missing
You need exuberant-ctags installed, otherwise there will be an error. You can do this with sudo apt install exuberant-ctags or brew install ctags.
Spell checking
When writing text, having some checks on your spelling can be useful, especially when you are getting tired, writing long pieces and/or not even using your native tongue. I can toggle through various languages using F7 and vim will highlight misspelled words accordingly.
To move to a misspelled word, use ]s and [s. The ]s command will move the cursor to the next misspelled word, the [s command will move the cursor back through the buffer to previous misspelled words.
Once the cursor is on the word, use z=, and Vim will suggest a list of alternatives that it thinks may be correct. With the numbers, you can then quicly replace the word with that suggestion. If you like to add the word to your local dictionary instead, use zg for 'good'. It will add it to the relevant word lists in ~/.vim/spell/.
I found a neat trick to quickly try to fix misspellings with ctrl + l on this blogpost. The author has a lot more gems in that article and on others on his site.
" Spell Check (http://vim.wikia.com/wiki/Toggle_spellcheck_with_function_keys)
" Loop through various languages to select the one to spellcheck with
let b:myLang=0
let g:myLangList=["nospell","nl","en_gb","en_us"]
function! ToggleSpell()
  if !exists( "b:myLang" )
    let b:myLang=0
  endif
  let b:myLang=b:myLang+1
  if b:myLang>=len(g:myLangList) | let b:myLang=0 | endif
  if b:myLang==0
    setlocal nospell
  else
    execute "setlocal spell spelllang=".get(g:myLangList, b:myLang)
  endif
  echo "spell checking language:" g:myLangList[b:myLang]
endfunction

" Map <F7> to toggle the language with
nmap <silent> <F7> :call ToggleSpell()<CR>

" In case the spelling language was set by other means than ToggleSpell() (a filetype autocommand say):
if !exists( "b:myLang" )
  if &spell
    let b:myLang=index(g:myLangList, &spelllang)
  else
    let b:myLang=0
  endif
endif

" Correct previous spelling error with Ctrl+l. jumps to the previous
" spelling mistake [s, then picks the first suggestion 1z=, and then
" jumps back `]a. The <c-g>u in the middle make it possible to undo
" the spelling correction quickly.
" https://castel.dev/post/lecture-notes-1/
inoremap <C-l> <c-g>u<Esc>[s1z=`]a<c-g>u
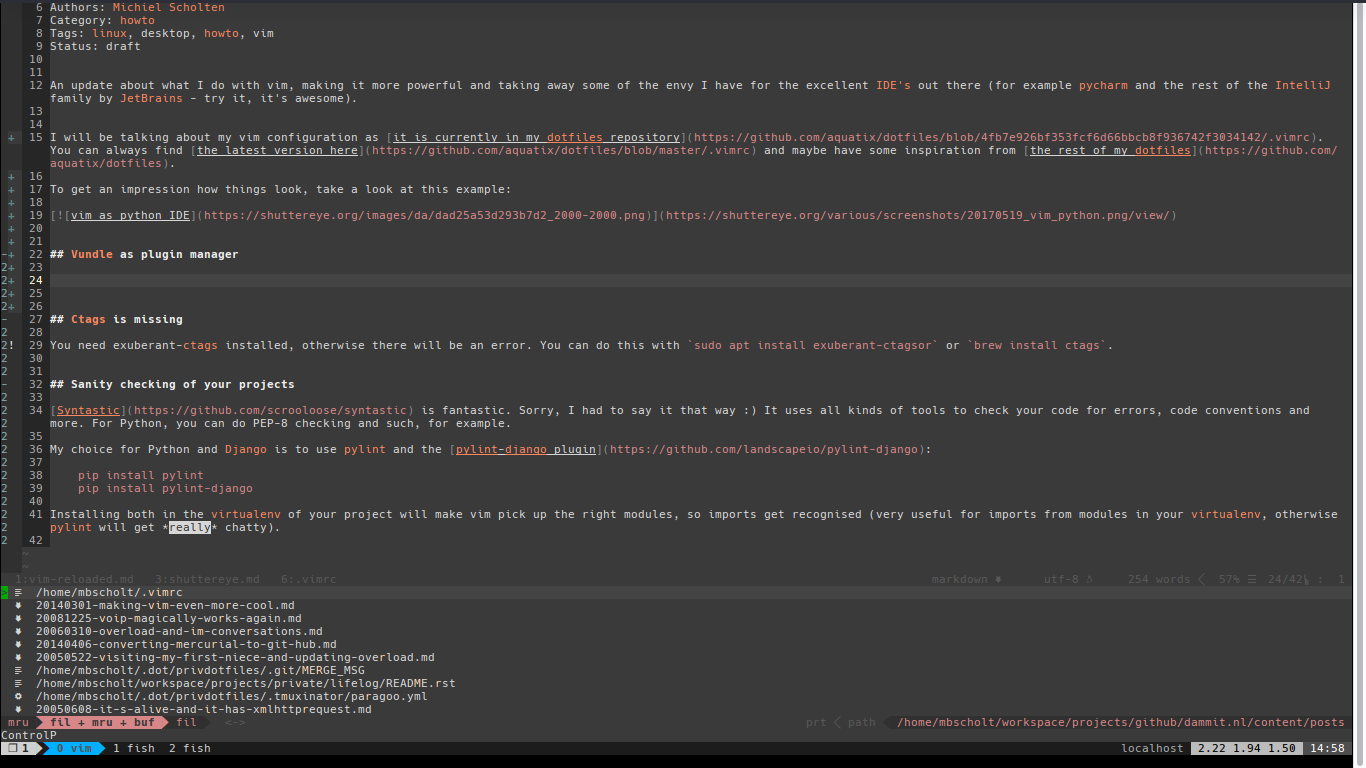
The red and underlined words here are marked by the spell checker.
Distraction-free writing
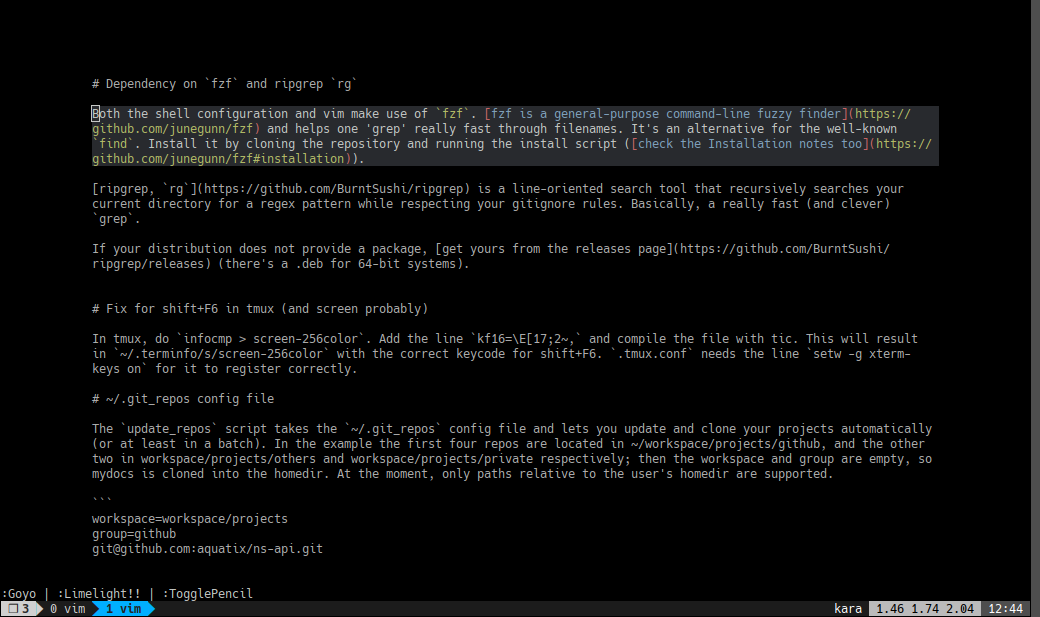
Speaking of writing longer pieces, you might want to do so in a less distracting environment. Numerous text editors have popped up, providing a window or fullscreen writing canvas with basically just your text. With vim, you do not need a separate editor, as it has you covered. Well, with some help from goyo, limelight, and vim-pencil, which take care of removing all unnecessary chrome, removing unnecessary highlighting (focussing on the current paragraph), and things like soft returns respectively:
" Distraction-free writing, start with <Leader>V (\V or ,V in this config)
Plug 'junegunn/goyo.vim'
let g:goyo_width = 120

" Help focus on text by dimming other parts a bit
Plug 'junegunn/limelight.vim'
let g:limelight_conceal_ctermfg = 'Grey69'
let g:limelight_conceal_ctermfg = 145
" Color name (:help gui-colors) or RGB color
let g:limelight_conceal_guifg = '#b0b0b0'

" Helps with writing prose (better line breaks, agnostic on soft line wraps vs
" hard line breaks etc)
Plug 'reedes/vim-pencil'
" Disable automatic formatting, as this automatically merges lines devided by
" 1 hard enter only, which can be annoying
let g:pencil#autoformat = 0
" Do not insert hard line breaks in the middle of a sentence
let g:pencil#wrapModeDefault = 'soft'  " default is 'hard'

" Toggle Gogo with Limelight and Pencil together with ,V
nmap <leader>V :Goyo <bar> :Limelight!! <bar> :TogglePencil <CR>
Further reading
Another good read is Vim After 15 Years, in which Ian Langworth describes his own setup. We have some similarities, and of course some differences.
I do not do much LaTeX writing at the moment, but if you do, you should check out the vimtex plugin.
This weblog has a vim tag, which binds my vim musings together.
Also, I did not talk about all the plugins in my .vimrc, so make sure to browse through it, and check out the various highlight plugins and other hidden gems.
You might also have noted a bar completely at the bottom in the screenshots in this article. This is from tmux, which I can highly recommend if you are doing any work in terminals. I think another article highlighting some useful features and tweaks for this terminal multiplexer will follow soonish(tm).
romainl has some interesting links to do all kinds of nifty vim stuff without plugins, or with at least as possible.
Changes
On 2020-01-25, I added a :Rg command for fuzzy finding text inside files; this is a better version of the :Find that's already in the snippet, as the :Find variant also searches the text in the filenames, which is already done with :Files leader+o).
On 2021-01-08, I wrote a small howto on YouCompleteMe requiring a rather new vim, about how to use an older snapshot of YCM for vim versions 8.1 and below.

