- Tue 01 April 2025
- howto
- Michiel Scholten
- #linux, #desktop, #howto
This howto has been stewing for the greater part of a decade, and I finally came around to writing it as I was freshly installing Ubuntu 25.04 on my ThinkPad T480s hacktop. Most of the tweaks apply for Gnome 48 (and probably 47 still) on whatever distribution you like, but there are a few additional steps to decrustify Ubuntu.
To show you how far back this draft goes, the second version started like this:
This little howto has been long in the making, as I wanted to do a write-up of how I themed and tweaked my Gnome (Shell) based desktops to my liking for quite a while. My desktop environments are based on Ubuntu, but this howto can be applied to any distribution and OS that runs Gnome Shell. The setup described here is tested on at least Gnome 3.28, 3.30 and 3.32 (latest Gnome release), so for example works on Ubuntu 18.04 LTS and 19.04.
Yeah.
The first version was from February 2016, before Ubuntu even switched (back) to Gnome 3 from Unity, after it ditched Gnome in its version 2 days.
So anyway!
On Ubuntu, I started with installing the 'vanilla' version of Gnome Shell by installing the ubuntu-gnome-desktop package and choosing the GNOME or GNOME on Xorg session in the GDM login screen after selecting my user. Otherwise, you get the Ubuntu tweaked version of Gnome Shell, which might suite your tastes, but has the bar on the left side and some other tweaks I do not necessarily want (and previously some garish orange-based colours). I like orange, but the changes that ubuntu-gnome-desktop does to the bootscreen and the login screens are welcome, and it gives a bare-bones Gnome Shell to work with.
Speaking of Ubuntu, first we now really have to...
Nuke snap from orbit
I have feelings for Snap. They consist of me liking .deb files and even Flatpak a lot better, and not liking the weird (resource) issues that the Snap daemon and its packages tend to bring to the table. Yes, things have grown better; no, I'm still not going to use it.
Assuming that you want to keep Firefox (I still love my little fox), follow the instructions on the Mozilla howto to prepare using the 'real' .deb version, but do not install Firefox from there just yet.
After that, close Firefox, then sudo apt remove firefox* thunderbird* to remove the snap-based Deb packages from Ubuntu.
Now it's time to nuke snap:
# Get a list of everything that's installed
snap list
Name                       Version          Rev    Tracking         Publisher   Notes
bare                       1.0              5      latest/stable    canonical✓  base
core22                     20250210         1802   latest/stable    canonical✓  base
desktop-security-center    0+git.a2963a9    51     1/stable/…       canonical✓  -
firefox                    136.0.3-1        5947   latest/stable/…  mozilla✓    -
firmware-updater           0+git.22198be    167    1/stable/…       canonical✓  -
gnome-42-2204              0+git.38ea591    202    latest/stable/…  canonical✓  -
gtk-common-themes          0.1-81-g442e511  1535   latest/stable/…  canonical✓  -
prompting-client           0+git.1756bbf    87     1/stable/…       canonical✓  -
snap-store                 0+git.7a3a49a6   1248   2/stable/…       canonical✓  -
snapd                      2.67.1           23771  latest/stable    canonical✓  snapd
snapd-desktop-integration  0.9              253    latest/stable/…  canonical✓  -
thunderbird                128.8.1esr-1     684    latest/stable/…  canonical✓  -

# One by one remove the snap packages
sudo snap remove firefox thunderbird desktop-security-center firmware-updater
sudo snap remove prompting-client snapd-desktop-integration gtk-common-themes gnome-42-2204
sudo snap remove snap-store bare
sudo snap remove core22
sudo snap remove snapd

# Now remove the snapd package
sudo apt remove --purge snapd
Add a configuration file with nano or vim to prevent snapd from being installed again:
# sudo nano /etc/apt/preferences.d/snapd
Package: snapd
Pin: release a=*
Pin-Priority: -10
Now we got rid of that... thing, we can install the Deb package for Firefox, straight from the Mozilla repository we configured at the start.
sudo apt update
sudo apt install firefox
If you want Thunderbird, you can get it from the Mozilla Team PPA after creating a configuration file that should ensure it will not get overwritten by the Snap .deb again.
# Use nano or vim to create a new config file
sudo nano /etc/apt/preferences.d/mozillateamppa
Now add this to 'pin' the package to the Mozilla Team version:
Package: thunderbird*
Pin: release o=LP-PPA-mozillateam
Pin-Priority: 1001
You can additionally add the following in the same file to deprioritise the Ubuntu version for extra measure:
Package: thunderbird*
Pin: release o=Ubuntu
Pin-Priority: -1
When you were using nano to edit this file, press ctrl+x to exit and y to save.
Now install Thunderbird again:
sudo add-apt-repository ppa:mozillateam/ppa
sudo apt update
sudo apt install thunderbird
Myself, I use Evolution, BTW.
Making it pretty and pretty useful
To be able to get our fingers more dirty and being able to reach more buttons to push and knobs to fiddle, some useful applications have to be installed first.
# Gnome Tweaks, to set extra configuration for fonts, theming and other things
sudo apt install gnome-tweaks
# Extensions application
sudo apt install gnome-shell-extension-manager
# Browser connector to be able to use the Gnome Extensions website
sudo apt install gnome-browser-connector
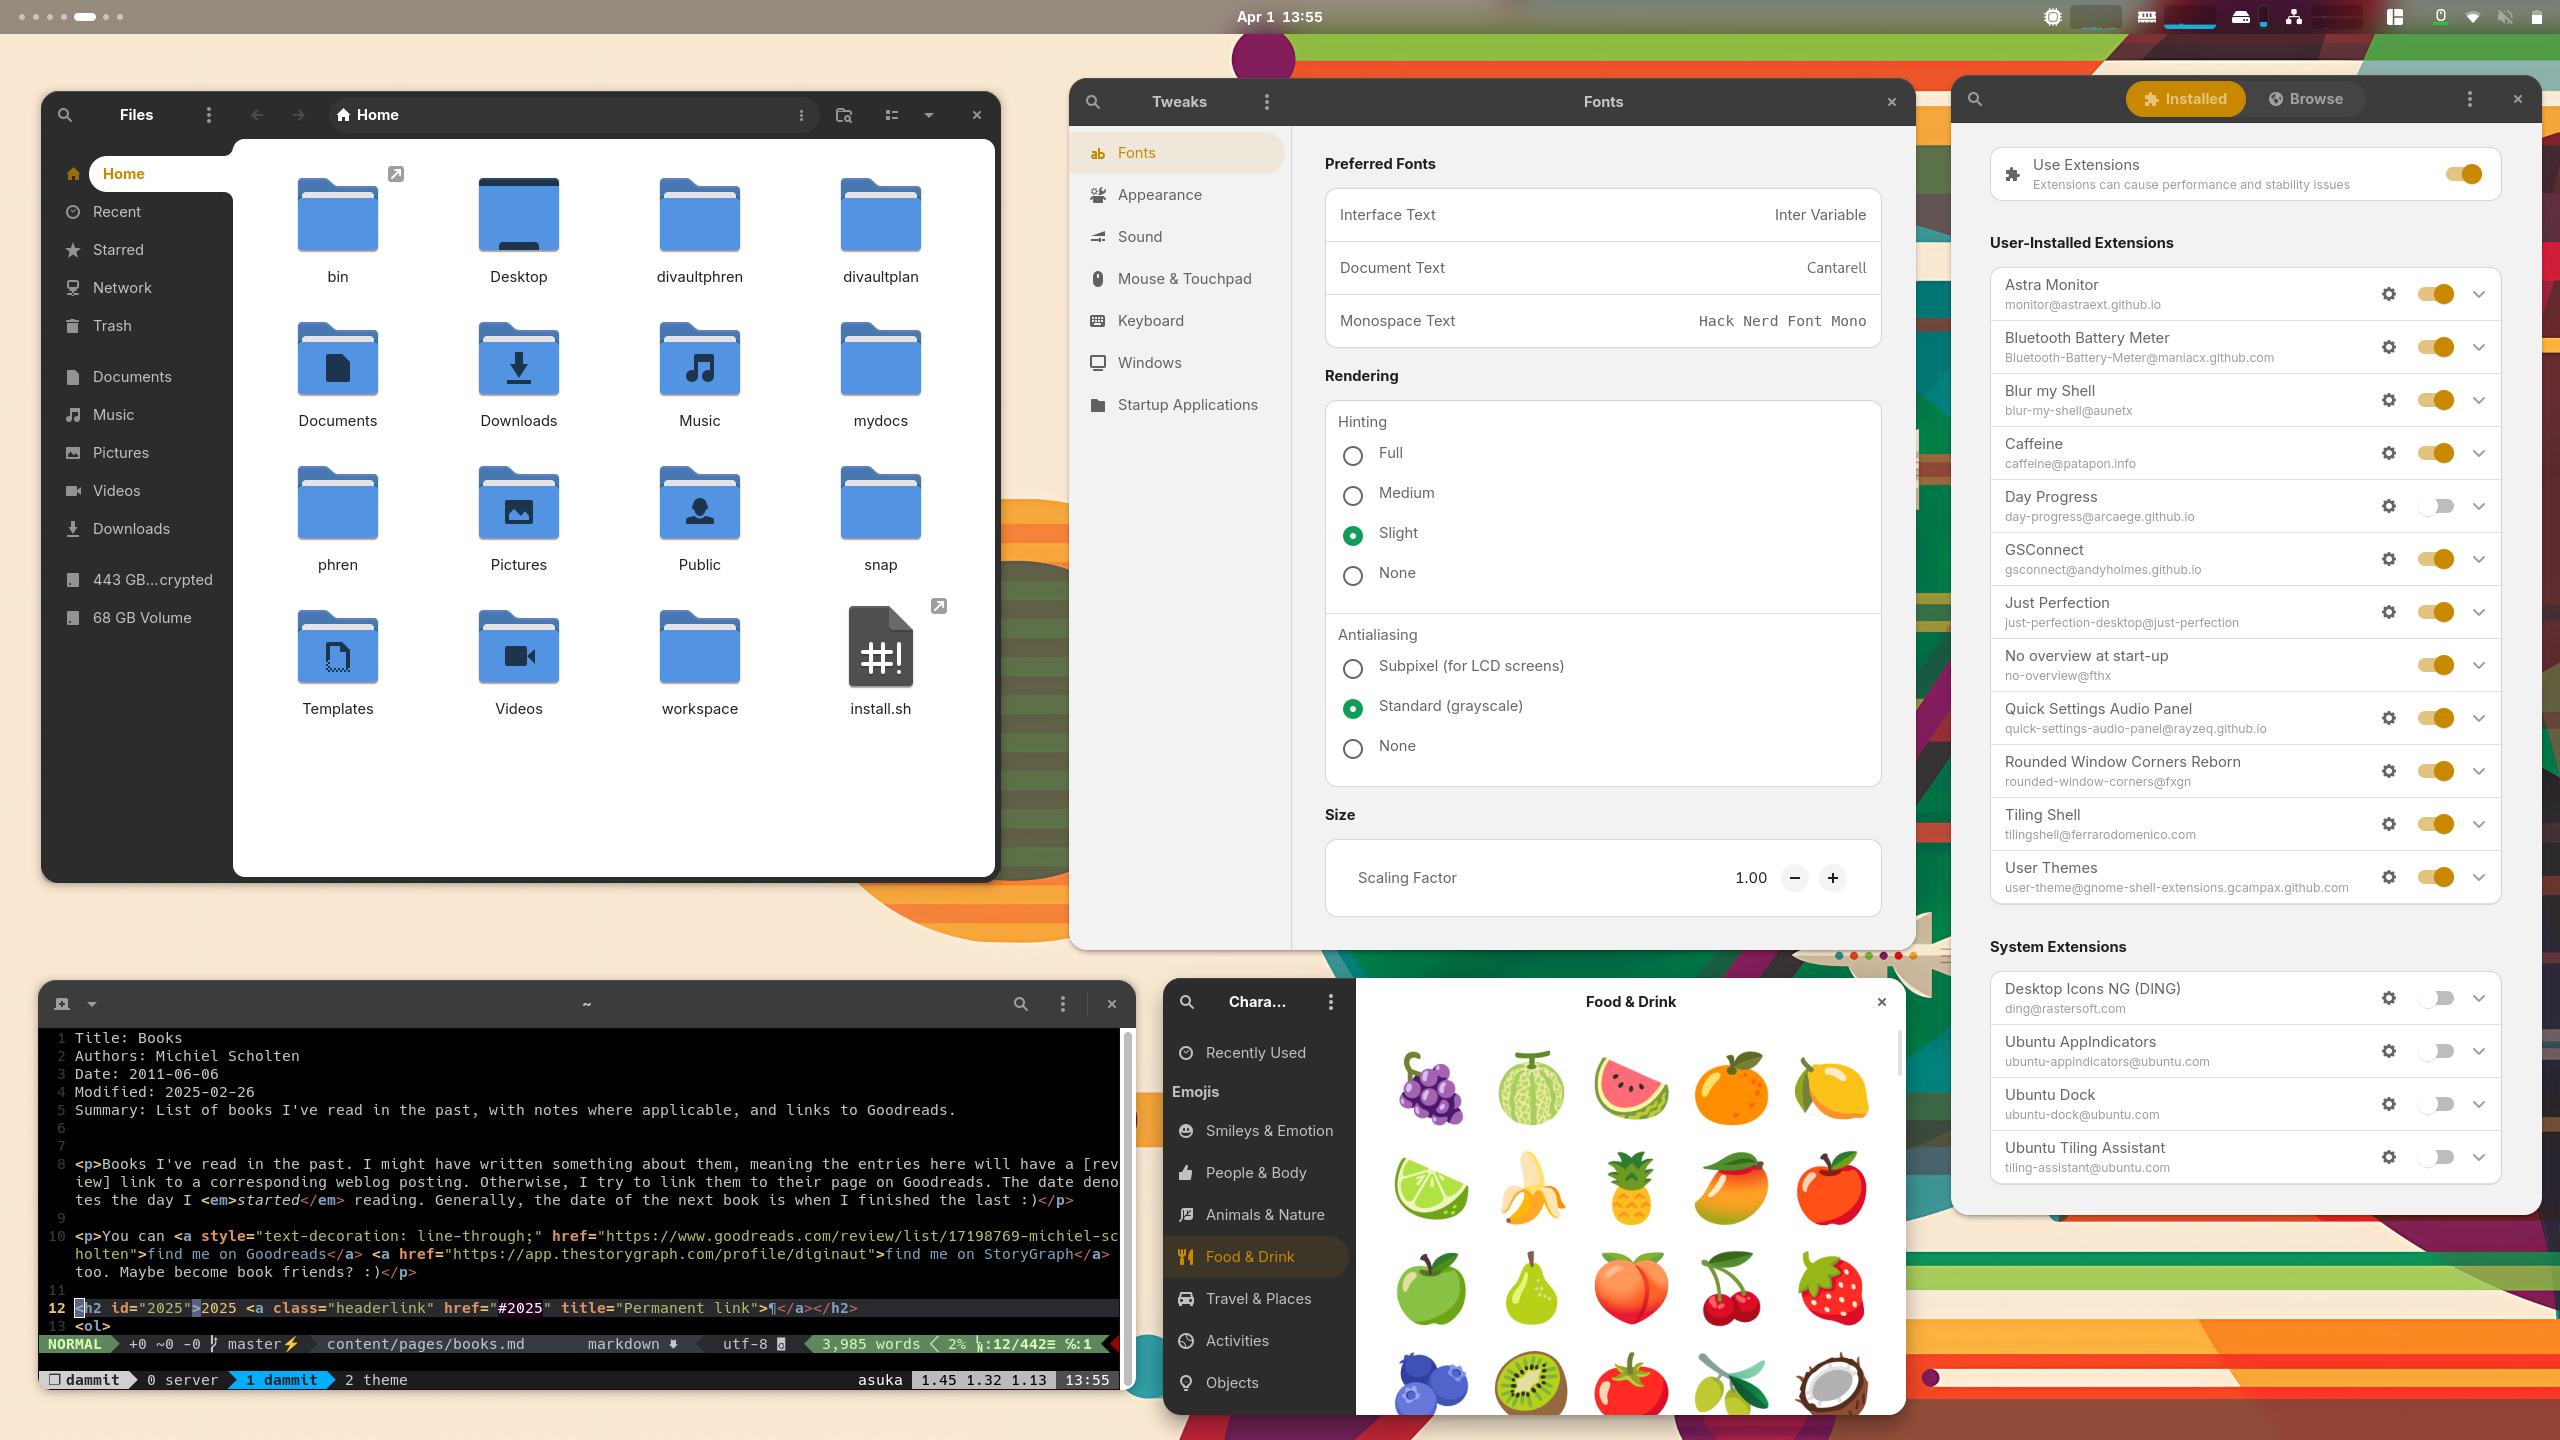
Previously, I had some extensions to declutter the environment, but Gnome has been taking care of that itself and is really usable already without additions; I think it cleaned up quite nicely in recent times. Most of the extensions I will list here and which I use will actually add functionality, but in such a way that it keeps out of your way while still providing extra information or convenience.
Let's start with the User Themes extension, as that enables custom themes for Gnome Shell, about which I'll speak later on.
Now launch the Extension Manager application or navigate to the Gnome Extension site. There you find a lot of additions and tweaks for Gnome Shell to be installed with a single click.
My suggestions:
- AppIndicator and KStatusNotifierItem Support - statusbar icons for certain applications
- Astra Monitor - useful graphs showing how busy your device is (needs
sudo apt install nethogs iotop gir1.2-gtop-2.0to be more effective) - Bluetooth Battery Meter - show battery status for your various devices straight in the Bluetooth panel, or even the top panel if you want; also for non-Bluetooth devices like mice, through Upower

- Blur my Shell (this by default blurs the top bar. If you like that, do not install the Transparent Top Bar extension; otherwise config to not blur the top panel and use that extension)
- Caffeine - (automatically) keep the screen from going blank/off
- GSConnect - super handy connector with your mobile phone, showing notifications, sending files to and fro, auto pausing music on incoming calls, showing battery status and lots more
- Just Perfection - tweak Gnome Shell
- No overview at start-up - do not stay on zoomed-out 'overview' mode when you log into Gnome, but show the desktop
- OpenWeather Refined - weather, of course
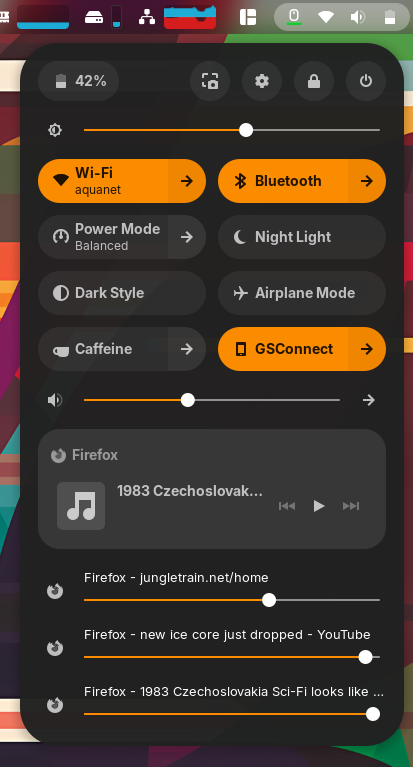
- Quick Settings Audio Panel - creates a new panel (or puts the bars in the existing panel) containing volumes and media control in the quick settings
- Rounded Window Corners Reborn - adjustable border radius for your windows, to add that playful effect (N.B.: typing this on 6th of November 2025 on Ubuntu 25.10, it currently might crash your session when using Firefox or some other applications with what I think use hardware acceleration. If that happens, just disable it for now until it gets fixed in a version higher than 14)
- Tiling Shell - very well executed tiling window system with both great keyboard and mouse support, definable layouts and other handy quality-of-life things
- Transparent Top Bar (Adjustable transparency - use to make the top bar completely transparent, or slightly less so; also it can become opace when you maximise a window
- User Themes - to be able to theme the shell portion of Gnome Shell
Bonus: Day Progress - configure this to show a bar from 09:00-17:00 on your work laptop ;)
Hint
Now is a good time to log out and log back in again, to make sure all extensions apply correctly. After that, we can do some tweaking in their settings.
Adjusting the default settings of the extensions
Open Extensions, or the Gnome installed Extensions page
Astra Monitor:
- Processors > Header: History Graph, Width: 50
- Memory > Header: History Graph, Show: yes, Width: 50; Realtime Bar, Show: no
- Network > Headers: IO, IO History Graph Width: 50
Blur my Shell:
- Panel: disable if you like to use the Transparent Top Bar extension instead
Day Progress:
- Time Elapsed: enable
- Start time: 09:00
- Reset time: 17:00 ;)
GSConnect:
- Whatever you like to enable or disable when using it with your phone (use the excellent KDE Connect app)
Just Perfection:
- Visibility: disable elements you don't want to see (myself I keep everything default)
- Behavior: enable 'Window Demands Attention Focus' to have focus shift to the relevant window when something happens, for example when you click a link in an application, Gnome will switch to your browser. If you use the Element app, you really want to disable its Notifications > 'Enable audible notifications for this session' setting
- Customize: I use the defaults, but you can tinker around with positions of elements and such here
OpenWeather Refined:
- Adjust the Units to your locale/preferences
- Choose a Weather Provider (I use OpenWeather myself, with a free custom API key)
- In Layout, choose the position in the panel; this can be with the clock in the middle of the bar, or for example at the right
- Forecast: Keep Forecast Expanded, to be able to see the forecast immediately once you click on the temperature in the top bar
Quick Settings Audio Panel:
- Where the panel should be: 'In the main panel'
- Panel position: 'Bottom'
Tiling Shell:
- Inner gaps: 4
- Outer gaps: 4
- Whatever else you like to customise
Transparent Top Bar (Adjustable transparency):
- (If you don't use the blur from Blur My Shell on the top panel)
- Top bar opacity: 25% (or 0 for full transparency)
- Opaque top bar when a window touches it: keep enabled when you want it to have a solid colour on touching windows, disable if you like it to be more transparent
User Themes:
- Orchis-Orange-Dark
... wait, where does that theme come from? Oh right, let's get that from its repository, where the excellent vinceliuice maintains it (be sure to check out their other themes too, Vince is very talented).
# Go to a suitable directory
cd ~/workspace/gnome-shell

git clone https://github.com/vinceliuice/Orchis-theme.git

cd Orchis-theme

# Install the dark and light variants with orange details, compact versions, and link (use) the light variant for applications
./install.sh -c dark -t orange --tweaks compact; ./install.sh -c standard -t orange --tweaks compact -l

# Of course, there's a lot to try out here; check ./install.sh to see what the possibilities are and choose your favourite colour and other tweaks
Open the Tweaks application, go to Appearance and choose 'Orchis-Orange-Dark' for Shell (probably already set through the User Themes config ;) ), and 'Orchis-Orange' for Legacy Applications (substitute your own choices here).

The Quick Settings Panel in Orchis Dark Orange style, with the audio additions
Ah yes, icons, those can be themed too! That brings us to my long-time favourite.
Papirus icon theme
This is a very comprehensive and well-designed icon theme that is not too flat, has distinctive figures for the icons and just looks pleasant. There's an easy way of installing it on Ubuntu-based/-like distributions, through the Papirus PPA:
sudo add-apt-repository ppa:papirus/papirus
sudo apt update
sudo apt install papirus-icon-theme
Close the Tweaks application window and open it again to have the new theme option show up under Appearance. At Icons, choose Papirus-Dark.
Terminal
Yes, we're going deeper. The terminal is in my top 3 most used applications, and I want it to look the part.
I use a Gnome Terminal colour theme by Gogh. Gogh supports a lot of colour schemes, so choose one to your liking. I found Argonaut to match nicely with the overall theme, and providing enough contrast to be easily readable while also using pleasant colours. Gogh supports multiple terminal emulators, so you're not stuck with Gnome Terminal.
# Prepare so Gogh can do its thing
sudo apt-get install dconf-cli uuid-runtime

# Make sure you are not in a tmux session or something, but 'directly' in Gnome Terminal or another support terminal
# Use the Gogh theme manager/downloader interactively:
bash -c "$(wget -qO- https://git.io/vQgMr)"
# (yes, this executes code straight from the web...)

# Choose option 10, Argonaut, or another pretty set of colours that suits your fashion
Right click the terminal, click Preferences. Under General, uncheck 'Enable the menu accelerator key (F10 by default)' so we can use mc and other applications correctly.
There should be an Argonaut entry under the Profiles in the left bar. Select it, click its little arrow button and make it the default. In the Text tab right next to it, you can make the default size of the terminal window a bit bigger by increasing the columns and rows settings (I use 120 and 40 for example).
Warning
The rest of the configuration assumes the Fish shell, but most of it also works under Bash or zsh, whatever rows your boat.
A very versatile (and potentially pretty) prompt tool (yes, that's a thing) is the Starship prompt:
# Install and enable
curl -sS https://starship.rs/install.sh | sh

# Sigh, another script that you run straight from the tubes
You can use my starship config by clone my dotfiles or just getting the raw version of the toml config file and putting it in your ~/.config directory.

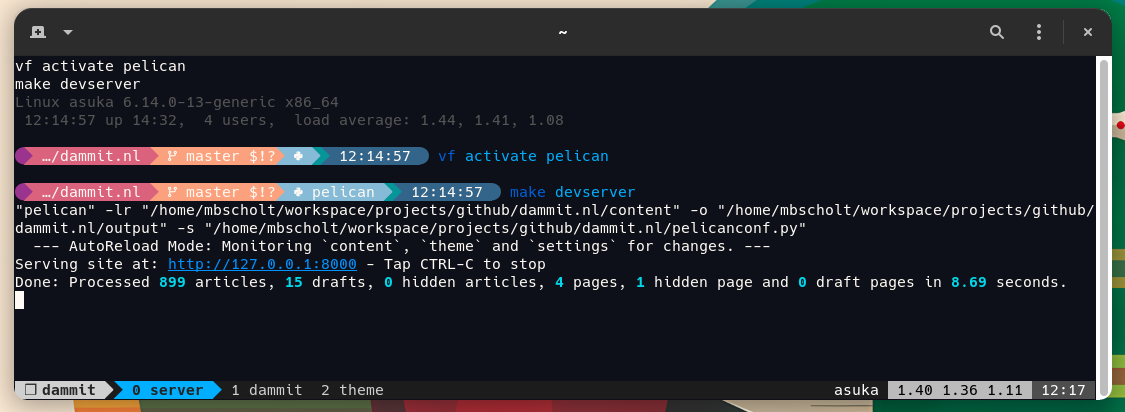
My custom Starship prompt, with Git, virtualenv support (and more).
The tmux terminal multiplexer is better than screen, and provides a way of tiling in your terminal, and/or having multiple windows inside of it. Apart from that, it's great for being able to detach from that session and continue later - especially handy when run on a remote computer.
My tmux config has not changed for more than six years, and serves me every day in various forms and ways. It does change the prefix to ctrl+a like in screen though as that has been in my muscle memory for too long.

tmux session started through tmuxinator, with setup for this weblog. Mind the bar at the bottom
Other useful tooling for (automating) CLI work are direnv and tmuxinator. tmuxinator helps automatically configuring tmux sessions, while direnv can load and unload environment variables depending on the current directory, so for example automatically enabling a Node and Python venv environment when you cd into a directory.
Installing them is pretty easy:
sudo apt install direnv tmuxinator
An example tmuxinator config that sets up a little development/writing environment for my weblog:
# ~/.tmuxinator/dammit.yml

name: dammit
root: ~/workspace/projects/github/dammit.nl

# Runs before everything. Use it to start daemons etc.
on_project_start: git pull

# Runs in each window and pane before window/pane specific commands. Useful for setting up interpreter versions.
pre_window: vf activate pelican

# Pass command line options to tmux. Useful for specifying a different tmux.conf.
# tmux_options: -f ~/.tmux.mac.conf
tmux_options: -2

# Change the command to call tmux.  This can be used by derivatives/wrappers like byobu.
# tmux_command: byobu

windows:
  - server: make devserver
  - dammit:
  - theme:
      root: ~/workspace/projects/github/pelican-alchemy
This creates a tmux session with three windows, one with a running devserver, one with a prompt in the working dir ready to add a post, or edit something with for example vim, and one with a prompt in the theme directory.
Split view:
windows:
  - notes:
      #layout: layout af31,363x97,0,0{182x97,0,0,0,180x97,183,0[180x48,183,0,1,180x48,183,49,4]}
      layout: main-vertical
      panes:
        - sudo -i
        - opennotes
  - example:
      root: ~/workspace/projects/private/example-project
      panes:
        - vim tryout.py
        - vf activate somethingelse; nvm use node

# The latter window splits into two panes, opens a Python file in the one,
# and activates a different venv and node env in the second
Python terminal tooling
For Python virtualenvs, Virtualfish is a useful helper, with functions like vf new whatever_venv_you_want for creating, vf activate that_venv for activating, and vf upgrade an_old_venv for updating an existing virtualenv to a new Python version.
VirtualFish itself is a Python package, and to be able to install this 'system wide', or at least for your user, these days you have to specify --break-system-packages to convince pip you really want this package installed outside of a virtualenv.
sudo apt install python3-pip
# Install virtualfish outside of a virtualenv
python3 -m pip install --break-system-packages --user virtualfish
vf install
# Reload fish shell to enable in current terminal:
exec fish
If you are familiar with modern Python development, uv will likely be on your radar. I like having it available outside of virtualenvs (so I can manage themselves), so I install it in my user home:
curl -LsSf https://astral.sh/uv/install.sh | sh

# Yet another script that you run straight from the tubes
Workspace navigation
Added @ 2025-04-01 21:25
I like being able to quickly switch between the various workspaces that Gnome creates automatically for me. You can switch to previous and next with ctrl+alt+arrow left/right or with 3-finger-swipe, but from my XFCE4 times back in the early naughties, I've been using super+F-key to immediately jump to the corresponding workspace with that number (super is the Windows meta key).
The first four can be set through the Keyboard settings of the regular Settings app. Under 'Keyboard Shortcuts', there's 'View and Customize Shortcuts' with a section called 'Navigation' that contains those.
However, I regularly use more than four workspaces, so I like to assign the whole F-key-bar to this functionality. Normally, I would use the dconf-editor application to go to org.gnome.desktop.wm.keybindings and set them all by hand, but there's a gsettings command-line tool that can do the same. By copy/pasting, I was able to quickly set it for all 12 F-keys:
gsettings set org.gnome.desktop.wm.keybindings switch-to-workspace-1 "['<Super>F1']"
gsettings set org.gnome.desktop.wm.keybindings switch-to-workspace-2 "['<Super>F2']"
gsettings set org.gnome.desktop.wm.keybindings switch-to-workspace-3 "['<Super>F3']"
gsettings set org.gnome.desktop.wm.keybindings switch-to-workspace-4 "['<Super>F4']"
gsettings set org.gnome.desktop.wm.keybindings switch-to-workspace-5 "['<Super>F5']"
gsettings set org.gnome.desktop.wm.keybindings switch-to-workspace-6 "['<Super>F6']"
gsettings set org.gnome.desktop.wm.keybindings switch-to-workspace-7 "['<Super>F7']"
gsettings set org.gnome.desktop.wm.keybindings switch-to-workspace-8 "['<Super>F8']"
gsettings set org.gnome.desktop.wm.keybindings switch-to-workspace-9 "['<Super>F9']"
gsettings set org.gnome.desktop.wm.keybindings switch-to-workspace-10 "['<Super>F10']"
gsettings set org.gnome.desktop.wm.keybindings switch-to-workspace-11 "['<Super>F11']"
gsettings set org.gnome.desktop.wm.keybindings switch-to-workspace-12 "['<Super>F12']"
Alternative universal applications
As we got rid of Snap, and not all applications are provided as a .deb package from a (Ubuntu or PPA) repository, we can use the universal AppImage and Flatpak formats instead.
AppImage applications
Running the PlexAmp AppImage or the excellent Open Red Alert or its Combined Arms mod can give you the following error:
dlopen(): error loading libfuse.so.2

AppImages require FUSE to run.
That's because AppImage needs FUSE, and version 2 to boot (version 3 is proably already installed by default). Fix it by:
sudo apt install libfuse2
Flatpak applications
Flathub has excellent documentation for setting up, but I'll summarise here:
# Install flatpak itself
sudo apt install flatpak

# Install GNOME Software Flatpak plugin
sudo apt install gnome-software-plugin-flatpak

# Add the Flathub repository
# Flathub is the best place to get Flatpak apps. To enable it, run:
flatpak remote-add --if-not-exists flathub https://dl.flathub.org/repo/flathub.flatpakrepo
A restart will ensure everything falls in place.
Afterwards, why not try the Gnome native Matrix client 'Fractal'?
flatpak install fractal
# Choose the option with app/org.gnome.Fractal/x86_64/stable
# You can also install this directly by doing:
flatpak install org.gnome.Fractal
Wrapping up
This scope-creeped a bit from tweaking GNOME to 'how to set up my laptop/workstation', but I hope it will provide some extra inspiration for your own environment.
Wallpaper
2025-04-11 per request
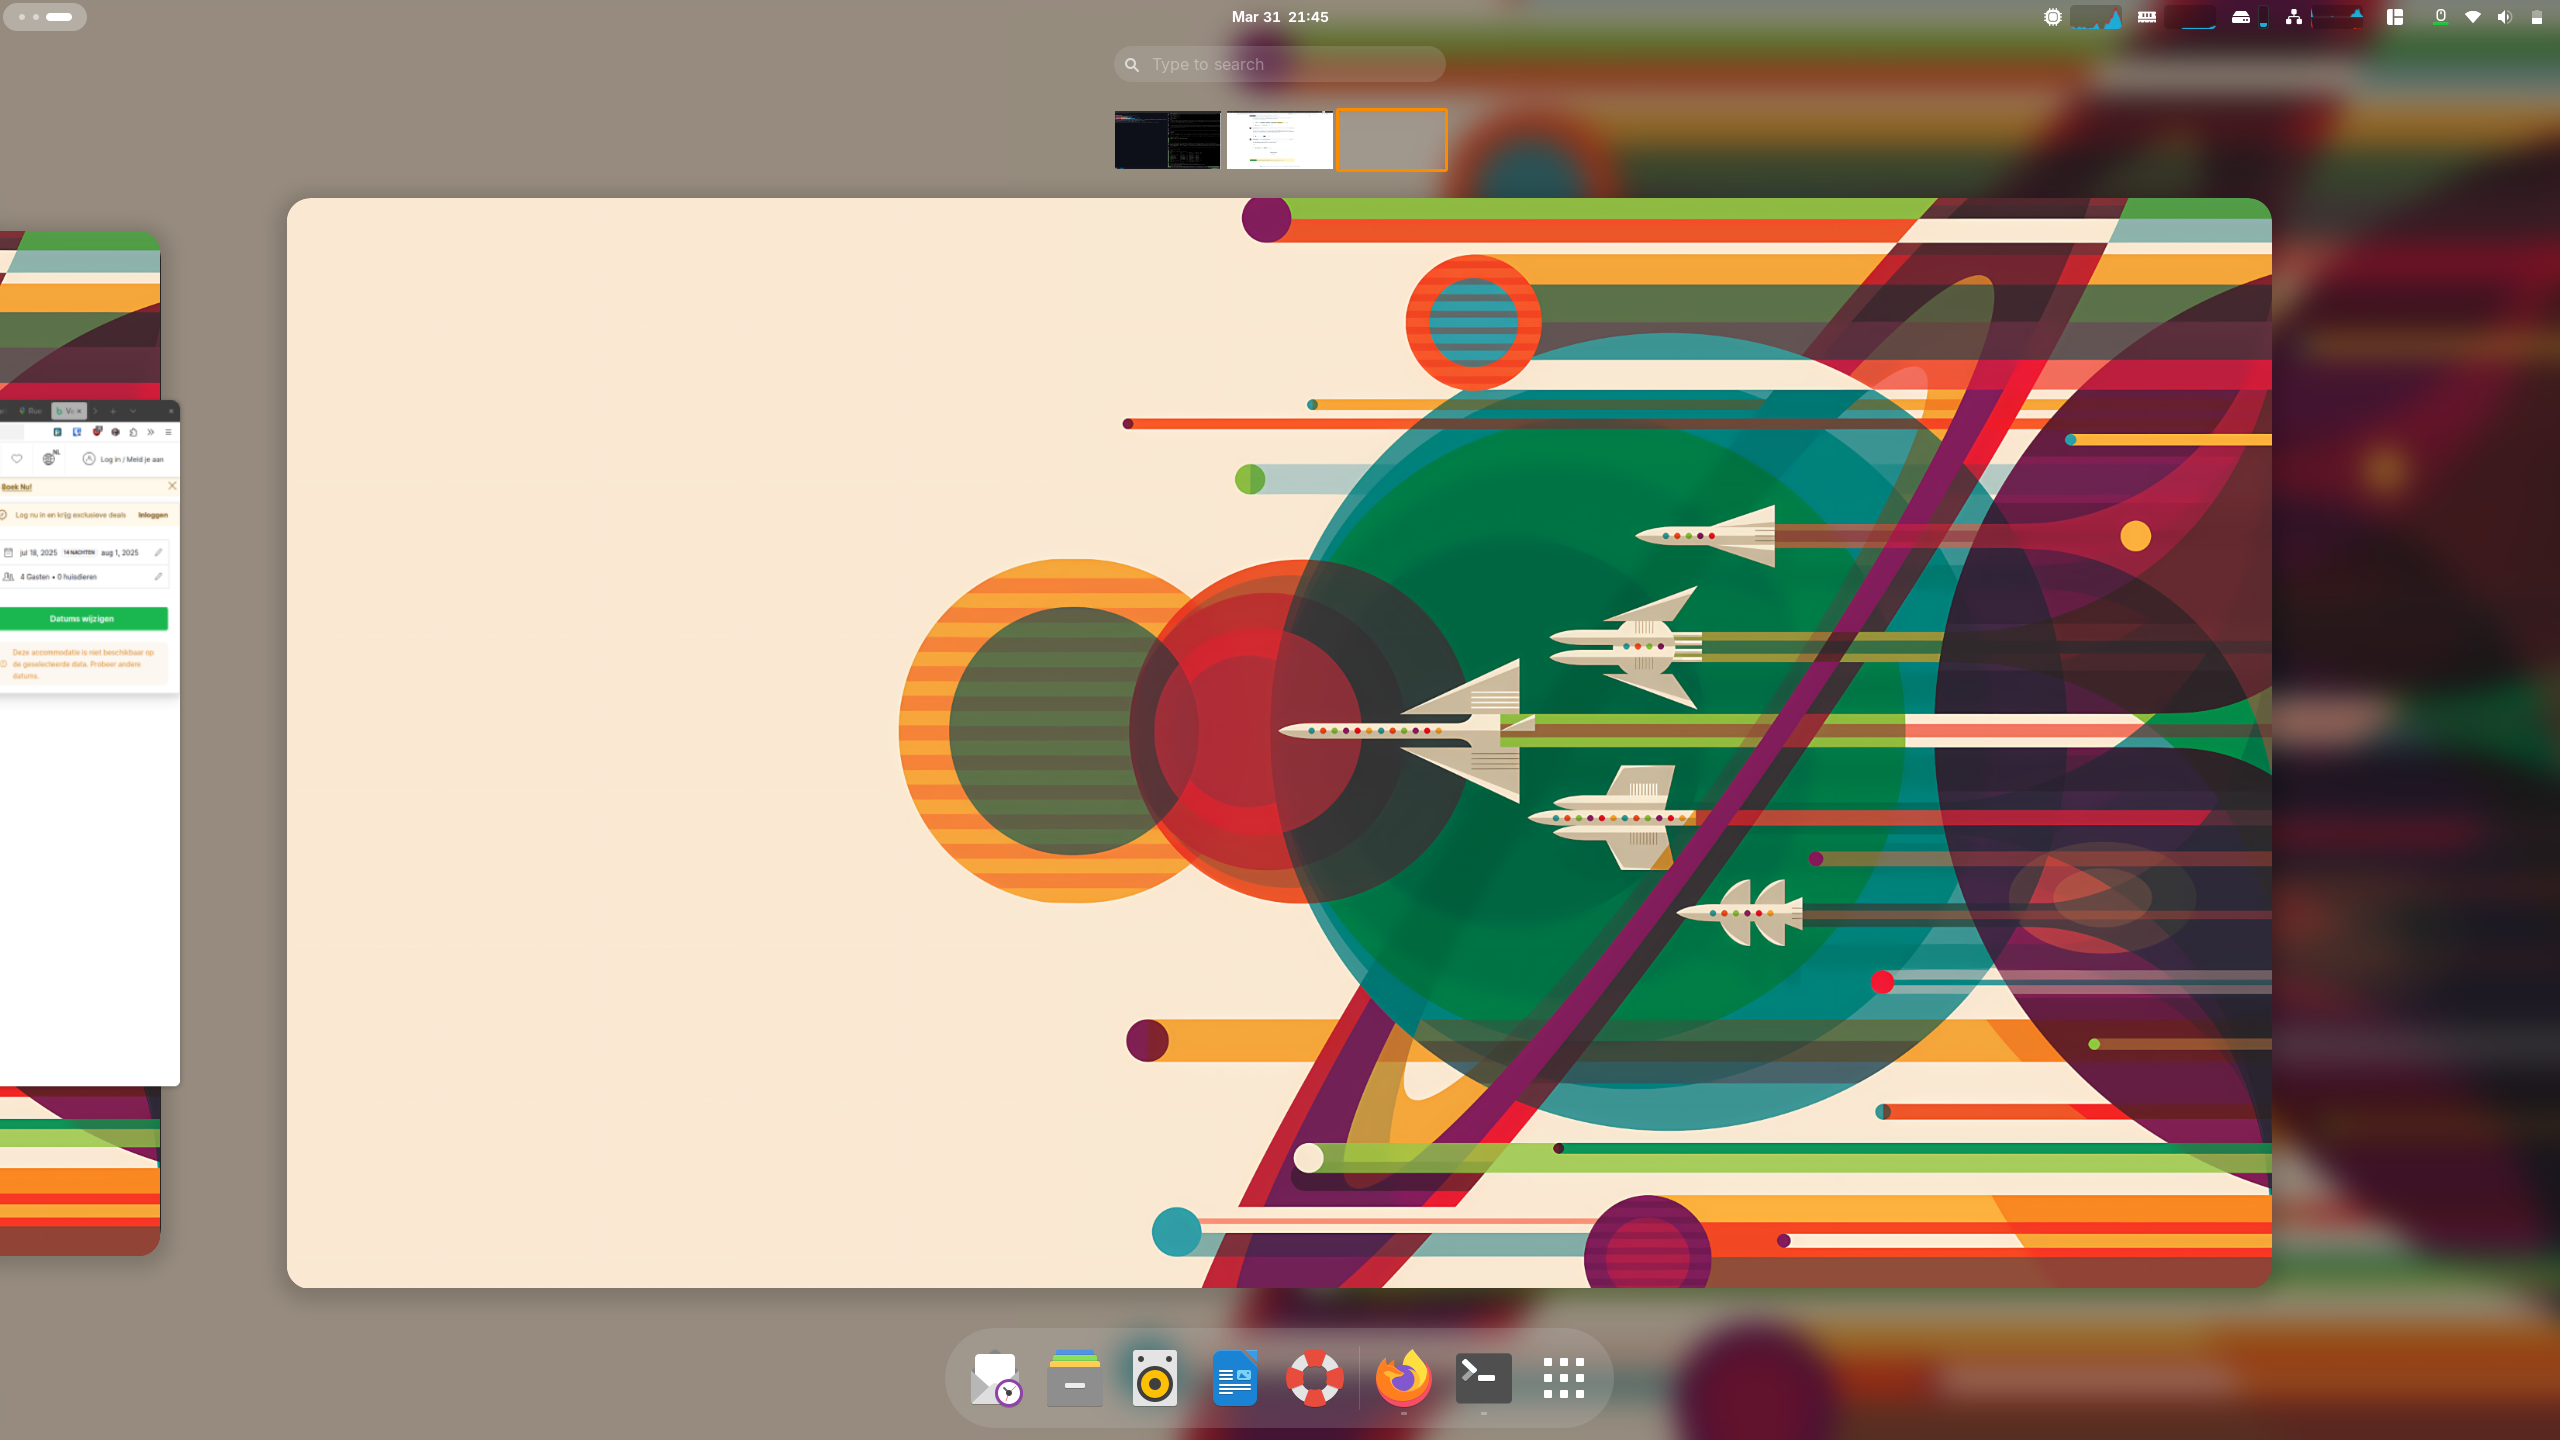
The wallpaper used in the example screenshots is sourced from the great NASA Visions of the Future collection, to be exact the The Grand Tour - JPL Travel Poster.
I made this into a 2560x1440 wallpaper, and also made a 4K upscaled version with the great Upscayl application. This one changes the details and colours a bit, which may or may not be to your liking, but at least it's sharp at 4K resolutions :) It's the one used in the screenshots.
2025-10-20 update
Added configuration file to pin snapd to a low priority to prevent it from getting installed again.


